Accidental Summer Day Project...
I was helping my dad clean out the garage just last week and we discovered that the previous owners of this house was a packrat. Yes, that means that we've never EVER cleaned out this garage O_o Interesting innit? The garage-cleaning story can be a post all on its own, but I'll just summarize the highlights here:
While cleaning stuff out... I found that we had some fairly large spiders in there. Nasty, nasty spiders. I'm not one to kill insects (unless they're trying to inflict some sort of harm to me) so my dad kept mashing the spiders whenever we came across them. *sploosh* that's right, *sploosh* that's how big they were... eew.
While mum and dad were outside I stayed in the garage moving the boxes in the corner to the outside of the garage. The purpose of this exercise was to clear the whole floor so that we could sweep it and then use the hose to spray it down. I noticed tikus droppings ALL OVER THE PLACE... that should have been some sort of hint that MAYBE, just maybe there was a tikus hiding somewhere in the garage. Guess what? I found its home O_O. For some reason I decided to open this one particular box (styrofoam) dunno why... the giant hole in the side should have been enough of a warning to stay away from it... but noooooooooo.
The next thing that my parents heard was a muffled yell (no, I didn't scream) as a huge black rat jumped out at me from inside the box (the yell was muffled because I was wearing a mask to protect my lungs from all the dust, etc...). I'm not sure that I was scared of the rat... I was surprised as hell tho. Wish I had my camera at that moment... meh. To tell you the truth, I wasn't sure whether I should kick it, step on it, or try to catch it :p I decided to just let it run off... into the neighbor's garage :D shh.
Anyway, the purpose of this tangent was to point out the fact that there was tons of wood store along the walls of the garage. We bundled them up (sorta) and put them outside our fence in the alleyway.
Along with the wood, we threw out boxes (with wood, of course) hoping that the garbage men would simply take it away the following day.
As it turns out... garbage men don't qualify wood & wood scraps as ordinary household garbage :p it was still there when we went out to check the next day. To tell you the truth, I wasn't too surprised. So I walked over to my dad and asked him:"hey dad, have you checked what's in that box? I mean, before you threw it out here."
I then proceeded to tear open the box and check the contents... wood... more wood... beveled wood... wth. It looked like pre-fab. Then I came across some assembly instructions.
"Uh, nope"
"Ooookay, why don't we have a look at what we were about to blindly thrown out"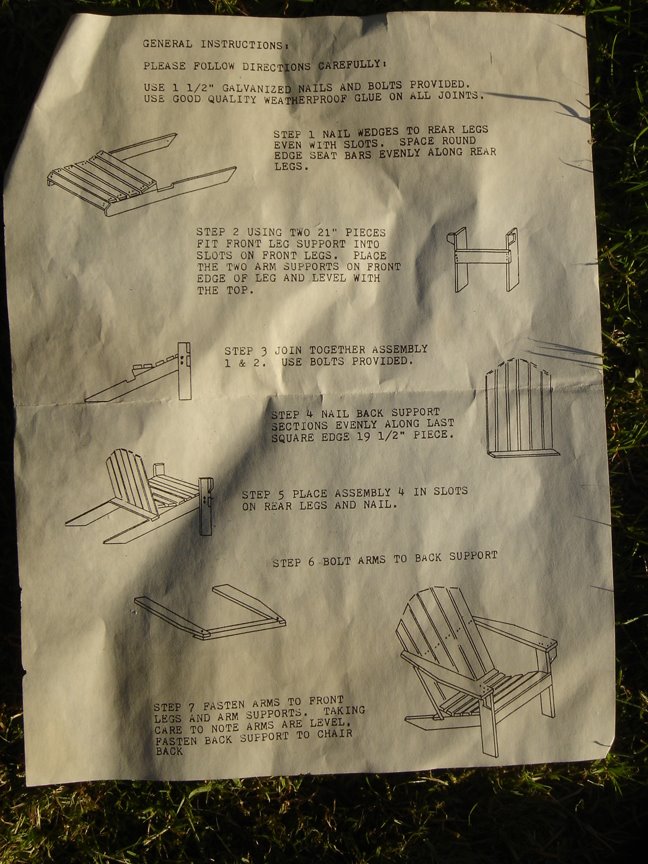
Weeeeeeeeee! Instructions on how to put together a garden chair :D And so I made it my accidental project for the day :D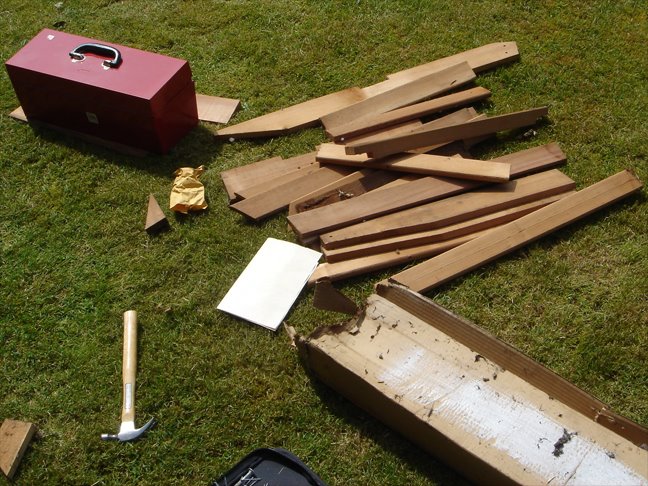 I opened up the box and laid out all if its contents... ok ok... they were just strewn about but whatever... The package even came complete with the galvanized nails and bolts :) The wood seemed like it was all in good condition and it looked like all the pieces where there. I ran off and grabbed our little red toolbox hehe... now I get to do some Tim Taylor stuffy stuff... tho I wasn't about to soup it up and make into some freaky Tool Time
 disaster project.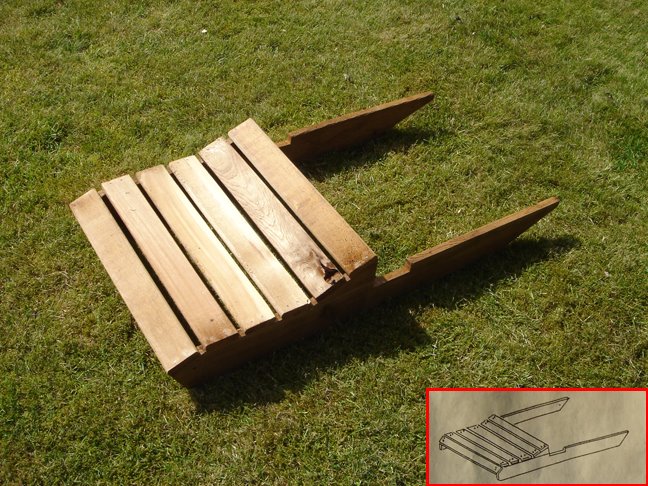 Time for me to put stuff together... Step 1. Nail wedges to rear legs even with slots. Space round edge seat bars evenly along rear legs. Looks simple enough :p problem was I didn't have a set square so I wasn't sure how square the pieces were... another problem... I don't have a workbench :p I had to sit on a stool and use the walkway... keke. Regardless... It seemed to turn out ok :) you'll notice it looks like there is a chunk missing from one of the slats, it's actually where a knot used to be... I didn't break it... I swear <_< >_>
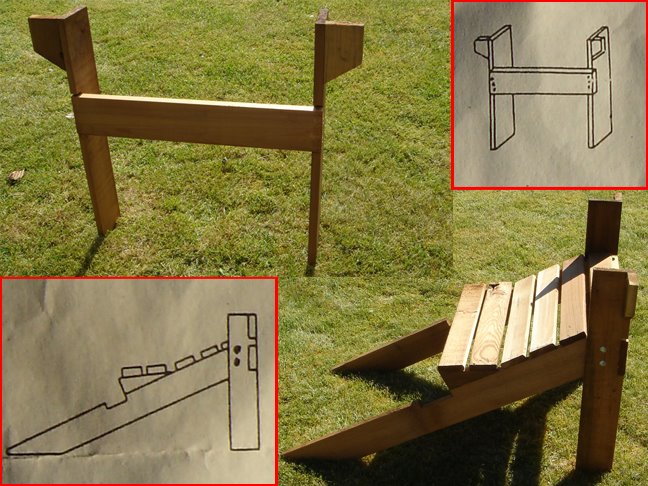
Step 2. Using Two 21" pieces fit front leg support into slots on front legs. Place the two arm supports on front edge of leg and level with the top. Step 3. Join together assembly 1 & 2. Use bolts provided. Hrm... Step 2 was simple enough, come step 3 however... I discovered that the holes that were pre-drilled for the bolts didn't even come close to lining up... and NO I did not put something together backwards. :@ Weee! I got to use the drill :p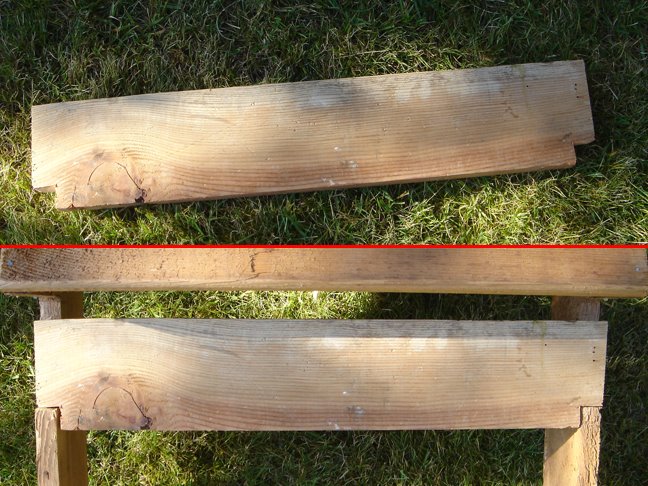 Step 4. Nail back support sections evenly along last square edge 19 1/2" piece. Umm... what last square edge 19 1/2" piece? OMGWTFBBQ... I'm missing a piece. *sigh* well, since we had so much wood kickin' around and I had already come so far, why not make my own square edge 19 1/2 piece? In that whole pile of wood I found 1 decent candidate... wow. And even that was stretching it... I had to file down one side to make it even (no I didn't have any sand paper on hand... so I have to use the file). and then I had to use that handsaw (shown below) to cut out the notches.
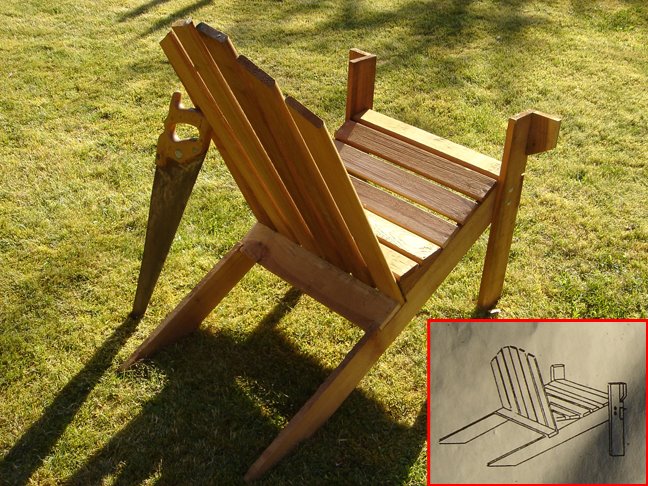 Step 5. Place assembly 4 in slots on rear legs and nail. As you can see, I managed to do an ok job regardless of the minor setback :p I had to cut the notches because the wood was not the right dimensions and the slats for the back would not have fit if I didn't otherwise. :) It worked out fine. The saw is just there to prop up the back ... just to match the drawing in the assembly instructions.
It's starting to look like a chair!!!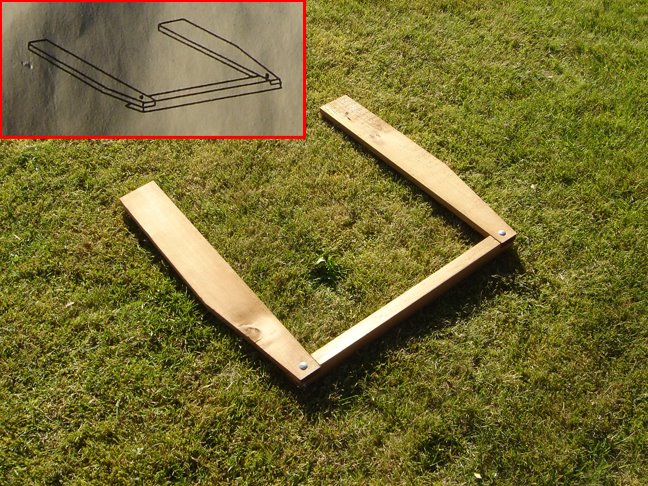 Step 6. Bolt arms to back support. Step 7. Fasten arms to front legs and arm supports. Taking care to note arms are level. Fasten back support to chair back.
TADAAAAA!!!!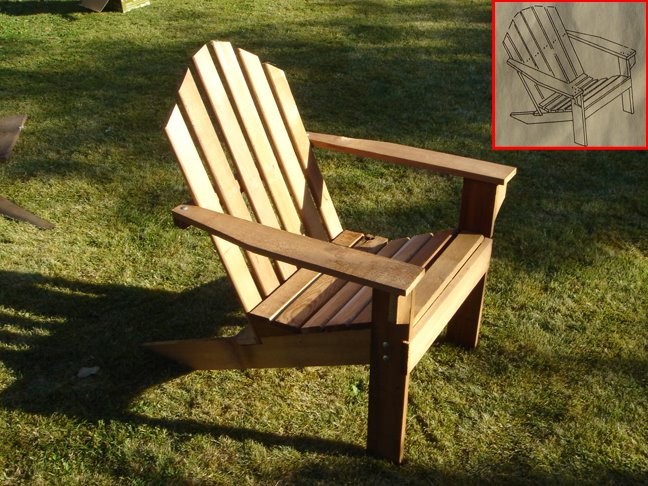
I'm quite pleased with the end result, AND it really does work :p you can sit in it and it doesn't break.. hehe.
Total time spent: over 4 hrs.
I believe you can pick up a chair like this in select stores... they cost somewhere between $50 and $80. If you're looking to get the original Adirondack Chairs they come at a greater cost... for some reason O.o...
The final product was sanded and stained :) I'll post a picture of it later ;)
![]()


6 comments:
Are you planning on keeping that lawn chair?
Yes, I am... but if you're looking to put in a bid for it... :p
It's a nice find isn't it? If you didn't check the box, you won't have got that chair.
definitely a nice find ;)
I haven't done any woodworking since I was a kid :p hehe.. it was a great project...
The only problem is, now it has me wanting to do more... :( and I can't figure out what to do... furthermore, I don't have all the necessary tools to make it easier :p
I would work on my Gundam Papercraft... but I can't remember who I lent my self-healing matt to O.o
That looks really cool. How long did you sit in the chair for? ;p
:) To tell you the truth, I haven't yet spent much time sitting in it :( Other people have tho ;) so I'm happy that it is actually being used :p
Post a Comment